
You fix wall cracks by preparing the area, widening cracks, applying filler, smoothing it down, and painting or finishing as needed. This process guarantees a complete and thorough repair.
This post will expand more on the steps in fixing wall cracks.
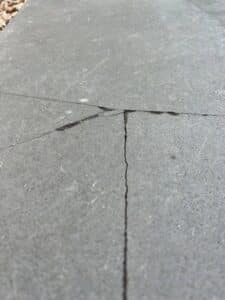
Steps to Fix Wall Cracks
The steps to fix wall cracks include prepping the area, widening the cracks, applying filler, and smoothing and finishing. Let’s have a closer look at each step below.
Step 1: Prepare the Area
Before addressing wall cracks, it’s crucial to prepare the area properly. This involves cleaning the crack and surrounding wall surface to remove any dust, debris, or loose paint. Use a soft brush or vacuum cleaner for thorough cleaning.
If the wall crack is due to a a sinking house, it’s essential to address this foundational issue first, as merely fixing the crack won’t solve the underlying problem. Ensure the area is dry and free from moisture before proceeding to the next step.
Step 2: Widen the Crack
Widening the crack may seem counterintuitive, but it’s necessary for a lasting repair. Use a chisel and hammer to gently widen the crack, creating a slightly inverted “V” shape. This shape allows the filler to adhere better and provides a more stable repair.
Be careful not to damage the surrounding wall. The goal is to create enough space for the filler to bond effectively, not to enlarge the damage.
Step 3: Apply Filler
Select a suitable filler for the wall material and the size of the crack. For plaster walls, a plaster-based filler is ideal, while for masonry, a masonry filler is recommended.
Fill the widened crack with the chosen filler using a filling knife, ensuring it’s packed tightly. Overfill slightly to account for shrinkage as the filler dries.
Is hiring a builder necessary for this step? It depends on the severity of the crack and your confidence in DIY tasks. For large or complex cracks, professional help is advisable.
Step 4: Smooth the Filled Area
Once the filler is applied, it’s important to smooth it out while it’s still pliable. Use a wet filling knife or a similar tool to smooth the filler flush with the wall surface.
This step requires a bit of finesse to ensure the filler blends seamlessly with the wall. Allow adequate time for the filler to dry completely, which may vary depending on the type and thickness of the filler used.
Step 5: Paint or Finish as Needed
After thoroughly drying the filler, sand the area lightly to ensure a smooth surface. Remove any dust from sanding before proceeding. Now, repaint or finish the repaired area to match the rest of the wall.
This might involve applying a primer before painting, especially if the wall is porous. Choosing the right paint and finishing tools will ensure a professional-looking result, restoring the aesthetic appeal of your wall.
Why Are My Walls Cracking?
Your walls may be cracking due to a shifting foundation, expansion of building materials, moisture damage, structural damage, or building wear and tear.
- Shifting foundation: Natural movement of a house’s foundation over time can result in the emergence of wall cracks.
- Expansion of materials: Changes in temperature can cause building materials to contract and expand, leading to cracks.
- Moisture damage: Excess moisture can weaken walls and cause them to crack.
- Structural damage: A damaged building structure, such as from substandard construction or an earthquake, can form wall cracks.
- Wear and tear: Old buildings may develop cracks as their materials age or due to long-term wear and tear.
What Happens If I Don’t Fix Wall Cracks?
Large wall cracks will become worse if you don’t fix them. You can expect more structural issues if you fail to address these problems as soon as possible.